环境
系统:centos6
节点:3个,ip分别为 10.16.5.12,10.16.5.18,10.16.5.19
es版本:elasticsearch-5.6.10
搭建集群,这里是其中一个节点,其他节点类似
Elasticsearch官方建议使用 Oracle的JDK8,在安装之前首先要确定下机器有没有安装JDK.
rpm -qa | grep -E '^open(jdk|jre)'
如果有,有可能是系统自带的openjdk,而非oracle的jdk。可以使用 rpm -qa | grep Java | xargs rpm -e –nodeps 批量卸载所有带有Java的文件,然后进行重新安装。
下载安装jdk
http://www.oracle.com/technetwork/java/javase/downloads/jdk8-downloads-2133151.html
这里使用此文件
jdk-8u181-linux-x64.tar.gz
[root@master ~]#tar xf jdk-8u181-linux-x64.tar.gz -C /usr/local/

[root@master ~]#cat /etc/profile.d/java.sh
# set java environment
export JAVA_HOME=/usr/local/jdk1.8.0_181
export JRE_HOME=${JAVA_HOME}/jre
export CLASSPATH=.:${JAVA_HOME}/lib:${JRE_HOME}/lib
export PATH=${JAVA_HOME}/bin:${PATH}

[root@master ~]#. /etc/profile.d/java.sh
[root@master ~]#java -version
java version "1.8.0_181"
Java(TM) SE Runtime Environment (build 1.8.0_181-b11)
Java HotSpot(TM) 64-Bit Server VM (build 25.181-b11, mixed mode)
其他系统设置不再赘述,关闭防火墙,最大文件打开数,最大打开进程数,selinux等
手动安装elasticsearch
最简单的方式是通过Yum或rpm的方式进行安装,这里介绍的是手动安装的方法:
进入官网查看下载方式
https://www.elastic.co/guide/en/elasticsearch/reference/current/install-elasticsearch.html
在这里选择历史版本,或者使用最新版本
https://www.elastic.co/downloads/past-releases
使用命令行进行下载:
[root@master ~]#wget https://artifacts.elastic.co/downloads/elasticsearch/elasticsearch-5.6.10.tar.gz
[root@master ~]#tar xf elasticsearch-5.6.10.tar.gz -C /usr/local/
内存不能太小,建议4G内存以上,不然出错
##############下面修改配置文件,具体根据http://www.cnblogs.com/ljhdo/p/4959412.html
## cluster
cluster.name: "graylog-es-cluster"

## node
node.name: "graylog-node-1"
node.master: true
node.data: true

## memory
bootstrap.memory_lock: false
bootstrap.system_call_filter: false

## network
network.host: 10.16.5.12
transport.tcp.port: 9300
http.port: 9200

## discovery
discovery.zen.minimum_master_nodes: 2
discovery.zen.ping.unicast.hosts: ["graylog-node-1", "graylog-node-2", "graylog-node-3"]

## protection
action.auto_create_index: false

## scripting
script.inline: true
修改jvm内存大小,可以设置为物理内存的一半,这里设置为30g
[root@master ~]# vim /usr/local/elasticsearch-5.6.10/config/jvm.options
-Xms30g
-Xmx30g
前台执行,查看是否有因为错误导致退出,根据提示来解决错误
[root@master ~]#su - elastic
[root@master config]# su - elastic
[elastic@master ~]$sh /usr/local/elasticsearch-5.6.10/bin/elasticsearch
错误解决后就可以在后台执行了
[root@master ~]#useradd elastic
[root@master ~]#chown -R elastic.elastic /usr/local/elasticsearch-5.6.10
[root@master ~]#su - elastic -c "sh /usr/local/elasticsearch-5.6.10/bin/elasticsearch -d"
遇到问题及解决方式:
bash /usr/local/elasticsearch-5.6.10/bin/elasticsearch
[2018-07-13T14:19:25,684][WARN ][o.e.b.ElasticsearchUncaughtExceptionHandler] [] uncaught exception in thread [main]
org.elasticsearch.bootstrap.StartupException: java.lang.RuntimeException: can not run elasticsearch as root

解决:
原因是elasticsearch默认是不支持用root用户来启动的。

解决方案一:Des.insecure.allow.root=true
修改/usr/local/elasticsearch-5.6.10/bin/elasticsearch,添加 ES_JAVA_OPTS="-Des.insecure.allow.root=true"
或执行时添加: sh /usr/local/elasticsearch-5.6.10/bin/elasticsearch -d -Des.insecure.allow.root=true
注意:正式环境用root运行可能会有安全风险,不建议用root来跑。

解决方案二:添加专门的用户
[root@master ~]#useradd elastic
[root@master ~]#chown -R elastic.elastic /usr/local/elasticsearch-5.6.10
[root@master ~]#su - elastic -c "sh /usr/local/elasticsearch-5.6.10/bin/elasticsearch -d"
问题:
[2018-07-13T14:27:17,256][WARN ][o.e.b.BootstrapChecks    ] [sq9-snF] max file descriptors [4096] for elasticsearch process is too low, increase to at least [65536]
[2018-07-13T14:27:17,256][WARN ][o.e.b.BootstrapChecks    ] [sq9-snF] max number of threads [1024] for user [elastic] is too low, increase to at least [2048]

解决:
设置用户最大进程数,最大文件打开数

echo "* soft nproc 65535" >> /etc/security/limits.conf
echo "* hard nproc 65535" >> /etc/security/limits.conf
echo "* soft nofile 655350" >> /etc/security/limits.conf
echo "* hard nofile 655350" >> /etc/security/limits.conf
echo "root soft nproc unlimited" >> /etc/security/limits.conf

删除此文件,避免干扰
rm /etc/security/limits.d/90-nproc.conf

echo "ulimit -u 65535" >> /etc/profile
echo "ulimit -n 655350" >> /etc/profile

重新登录终端生效
问题:
[2018-07-13T14:27:17,256][WARN ][o.e.b.BootstrapChecks    ] [sq9-snF] max virtual memory areas vm.max_map_count [65530] is too low, increase to at least [262144]

解决:
修改/etc/sysctl.conf 文件,添加设置
vm.max_map_count=262144

生效:sysctl -p


问题:
[2018-07-13T14:27:17,256][WARN ][o.e.b.BootstrapChecks    ] [sq9-snF] system call filters failed to install; check the logs and fix
your configuration or disable system call filters at your own risk

解决:
这是在因为Centos6不支持SecComp,而ES5.2.0默认bootstrap.system_call_filter为true进行检测,所以导致检测失败,失败后直接导致ES不能启动。

在elasticsearch.yml中配置增加或修改下面配置,注意要在Memory下面:
bootstrap.memory_lock: false
bootstrap.system_call_filter: false
测试是否正常
默认情况下 Elasticsearch 的 RESTful 服务只有本机才能访问,也就是说无法从主机访问虚拟机中的服务。
为了方便调试,可以修改 config/elasticsearch.yml 文件,去除network.host 和http.port之前的注释,并将network.host的IP地址修改为本机外网IP。然后重启,Elasticsearch
关闭方法(输入命令: ps -ef | grep elasticsearch ,找到进程,然后kill掉就行了。
如果外网还是不能访问,则有可能是防火墙设置导致的。
[root@master ~]#curl localhost:9200
{
  "name" : "sq9-snF",
  "cluster_name" : "elasticsearch",
  "cluster_uuid" : "X-XLj-biRra2TLkQXaR2Wg",
  "version" : {
    "number" : "5.6.10",
    "build_hash" : "b2f0c09",
    "build_date" : "2017-08-14T12:33:14.154Z",
    "build_snapshot" : false,
    "lucene_version" : "6.6.0"
  },
  "tagline" : "You Know, for Search"
}
安装插件bigdesk
添加下面内容
vim /usr/local/elasticsearch/config/elasticsearch.yml|grep "http.cors"
http.cors.enabled: true
http.cors.allow-origin: "*"

重新启动elasticsearch服务

[root@master ~]#cd /data
[root@master data]#wget https://github.com/lukas-vlcek/bigdesk/archive/master.zip
[root@master data]# vim bigdesk/js/store/BigdeskStore.js
var _vArray = version.split(".");
	//if (_vArray.length > 2 && _model.checkVersion(_vArray)) {
		_model.versionVerified(version);
		_model.initCluster(connection);
	//} else {
	//    _model.yellAboutVersion(version);
	//}

[root@master ~]# cd /data/bigdesk/
[root@master bigdesk]# nohup python -m SimpleHTTPServer 8000 &
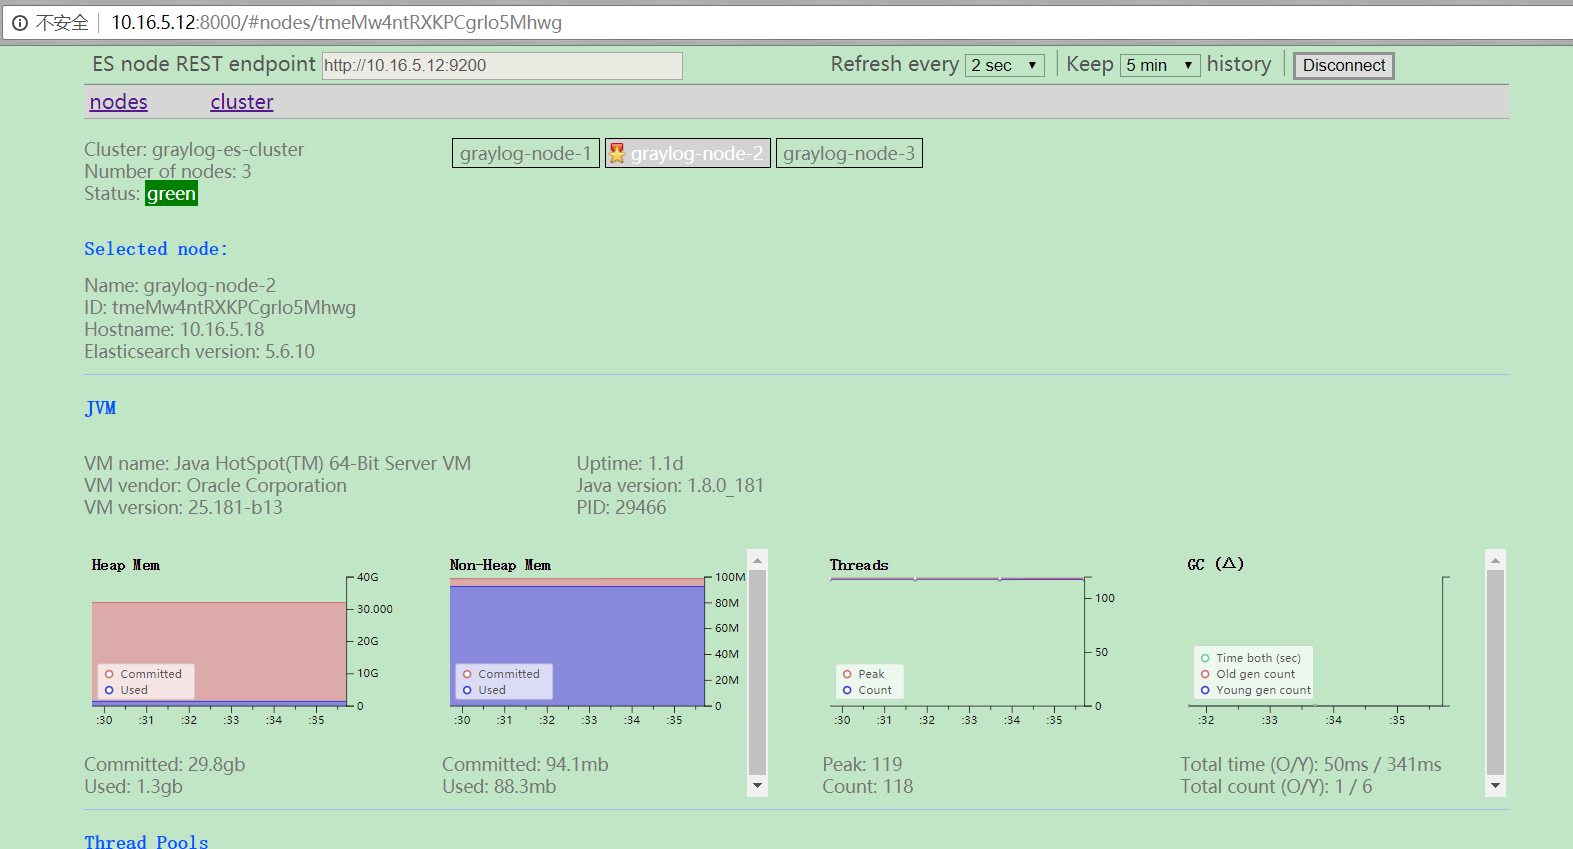
然后就可以通过8000端口来访问web页面了,在地址框中输入elasticsearch监听的ip和端口,点击连接就可以了

通过rpm包方式安装
下载对应版本的rpm
https://artifacts.elastic.co/downloads/elasticsearch/elasticsearch-5.6.12.rpm
如果需要配置对应java的内存大小,根据下面的文档设置
https://www.elastic.co/guide/en/elasticsearch/reference/current/rpm.html#rpm-configuring
修改参数
vim /etc/sysconfig/elasticsearch ES_HEAP_SIZE=3g
–
–
–
 江哥架构师笔记
评论前必须登录!
注册