当前环境
说下当前的系统环境
系统:centos6.8
配置好base仓库和epel仓库
安装GitLab的所需依赖包和工具
[root@localhost ~]#yum -y install vim-enhanced readline readline-devel \
gdbm-devel glibc-devel tcl-devel openssl-devel curl-devel expat-devel \
db4-devel byacc sqlite-devel gcc-c++ libyaml libyaml-devel libffi \
libffi-devel libxml2 libxml2-devel libxslt libxslt-devel libicu \
libicu-devel system-config-firewall-tui python-devel sudo wget \
crontabs logwatch logrotate perl-Time-HiRes ncurses-devel patch
编译安装git
因为GitLab需要的git版本要大于1.7.10以上,系统自带的git版本为1.7.1,需要自行编译安装高版本的git,在之前要先把系统上的git卸载掉。
安装依赖包
yum -y install zlib-devel curl-devel openssl-devel perl cpio expat-devel gettext-devel openssl zlib autoconf tk perl-ExtUtils-MakeMaker
从 https://github.com/git/git/releases 下载最新版的 zip 包或者 tar.gz 并解压:
以 tar.gz 格式为例(在网页的 tar.gz 上右键复制下载链接即可):
[root@localhost ~]#wget https://github.com/git/git/archive/v2.4.0.tar.gz
[root@localhost ~]#ls
v2.4.0.tar.gz
[root@localhost ~]#tar xf v2.4.0.tar.gz
[root@localhost ~]#cd git-2.4.0
[root@localhost ~/git-2.4.0]#autoconf
[root@localhost ~/git-2.4.0]#./configure --prefix=/usr/local/git
[root@localhost ~/git-2.4.0]#make && make install

[root@localhost ~]#cat /etc/profile.d/git.sh
PATH=/usr/local/git/bin:$PATH
export PATH
[root@localhost ~]#. /etc/profile.d/git.sh

[root@localhost ~]#git --version
git version 2.4.0
安装redis,nginx,mysql
根据自己写的0.4脚本来安装,redis监听6379,mysql和nginx待用
[root@localhost ~/install_lnmpr]#cat install.sh
#!/bin/bash

yum install -y dos2unix &> /dev/null
dos2unix ./*.sh &> /dev/null
chmod +x ./*.sh

./install_nginx.sh -u nginx -d /data/web -y
source /etc/profile.d/nginx.sh

./install_mysql.sh -d /data/mysql -b /data/mysql/binlog/mysql-bin -y
source /etc/profile.d/mysql.sh

./install_redis.sh -d /data/redis -p 6379 -y
source /etc/profile.d/redis.sh

#./install_php-fpm.sh -u php -d /data/web -y
#source /etc/profile.d/php.sh

#./install_redis-php.sh -b /usr/local/php -d /data/web -y
时间比较长,安装完成
redis安装完成后
Listen port: 6379
Bindir:      /usr/local/redis-6379
service:     /etc/init.d/redis-6379
Datadir:     /data/redis/redis-6379.rdb
Logdir:      /var/log/redis/redis-6379.log
安装ruby
[root@localhost ~]#mkdir ruby
[root@localhost ~]#cd ruby/
[root@localhost ~/ruby]#curl ftp://ftp.ruby-lang.org/pub/ruby/2.1/ruby-2.1.2.tar.gz | tar xz

[root@localhost ~/ruby]#cd ruby-2.1.2/
[root@localhost ~/ruby/ruby-2.1.2]#./configure --prefix=/usr/local/ruby

[root@localhost ~/ruby/ruby-2.1.2]#make && make install

[root@localhost ~]#cat /etc/profile.d/ruby.sh
PATH=/usr/local/ruby/bin:$PATH
export PATH
[root@localhost ~]#. /etc/profile.d/ruby.sh

[root@localhost ~]#ruby -v
ruby 2.1.2p95 (2014-05-08 revision 45877) [x86_64-linux]
安装bundle,下面这个命令在ruby目录下面,Ruby的一个包管理器,其格式被称为“Gem”
[root@localhost ~]#gem install bundler --no-ri --no-rdoc
创建git用户来运行gitlab服务
[root@localhost ~]#adduser -r -s /bin/bash --comment "GitLab" --create-home --home-dir /home/git git
配置gitlab-shell
GitLab shell是专门为GitLab开发的提供ssh访问和版本管理的软件。所有的文件都按照下面的路径,都放在git的家目录下面,配置里面会用到这个位置,在其他位置会识别不了
[root@localhost ~]#su - git
[git@localhost ~]$git clone  https://github.com/gitlabhq/gitlab-shell.git

[git@localhost ~]$cd gitlab-shell/    #切换到这个版本,使用这个版本
[git@localhost ~/gitlab-shell]$git checkout v2.0.1

[git@localhost ~/gitlab-shell]$ls
bin        config.yml.example  Gemfile.lock  hooks  LICENSE    spec     VERSION
CHANGELOG  Gemfile             Guardfile     lib    README.md  support
[git@localhost ~/gitlab-shell]$cp config.yml.example config.yml    #样例文件复制为配置文件

这里的配置不不不用修改
gitlab_url: “http://localhost:8080/“

下面的要修改
redis:
bin: /usr/local/redis-6379/bin/redis-cli    #修改为执行文件路径
host: 127.0.0.1
port: 6379
# pass: redispass # Allows you to specify the password for Redis
database: 0

[git@localhost ~/gitlab-shell]$./bin/install  #执行脚本安装其他一些必备的配置或者目录
配置数据库
首先要设置root的初始化密码,这里设置为234567,为了安全,不要空密码
[root@localhost ~]#mysql_secure_installation
在数据库创建对应的库和认证,密码自己设定
mysql> CREATE USER 'gitlab'@'localhost' IDENTIFIED BY 'gitlabpasswd';

#创建gitlaba使用的数据库
mysql> CREATE DATABASE IF NOT EXISTS `gitlabhq_production` DEFAULT CHARACTER SET `utf8` COLLATE `utf8_unicode_ci`;

# 给予gitlab用户权限
mysql> GRANT SELECT, LOCK TABLES, INSERT, UPDATE, DELETE, CREATE, DROP, INDEX, ALTER ON `gitlabhq_production`.* TO 'gitlab'@'localhost';
安装配置Gitlab
[root@localhost ~]#su - git
[git@localhost ~]$git clone https://github.com/gitlabhq/gitlabhq.git gitlab
切换分支
[git@localhost ~]$pwd
/home/git
[git@localhost ~]$ls
gitlab  gitlab-shell  repositories

[git@localhost ~]$cd gitlab
[git@localhost ~/gitlab]$git checkout 7-4-stable
Branch 7-4-stable set up to track remote branch 7-4-stable from origin.
Switched to a new branch '7-4-stable'
修改配置文件
[git@localhost ~/gitlab]$cd config
[git@localhost ~/gitlab/config]$ls
application.rb           environments        resque.yml.example
aws.yml.example          gitlab.teatro.yml   routes.rb
boot.rb                  gitlab.yml.example  unicorn.rb.example
database.yml.mysql       initializers        unicorn.rb.example.development
database.yml.postgresql  locales
environment.rb           newrelic.yml

[git@localhost ~/gitlab/config]$cp gitlab.yml.example gitlab.yml

# 修改配置文件中的访问域名(abc.com为项目的访问域名)
[git@localhost ~/gitlab/config]$sed -i 's#localhost#abc.com#g' gitlab.yml
#在这里如果是内网的机器,没有配置域名的话,将配置文件中的abc.com更改为自己的内网ip地址即可,比如这里更改为:192.168.175.11
以实际为准,这里涉及到以后邮件中的链接,如果是是内网ip,比如确认链接就会为:http://192.168.175.11/users/confirmation?confirmation_token=Wwat_UhQuSRHzA5-DEG9
点击即可确认用户
# 设定gitlab目录下log和tmp目录所有者和权限
$ chown -R git log/
$ chown -R git tmp/
$ chmod -R u+rwX log/
$ chmod -R u+rwX tmp/
# gitlab目录下创建tmp/pids/和tmp/sockets/目录, 确保gitlab有相应的权限
$ mkdir tmp/pids/
$ mkdir tmp/sockets/
$ chmod -R u+rwX tmp/pids/
$ chmod -R u+rwX tmp/sockets/
# gitlab目录下创建public/uploads目录
$ mkdir public/uploads
$ chmod -R u+rwX public/uploads
# 创建gitlab-satellites目录
[git@localhost ~]$mkdir /home/git/gitlab-satellites
[git@localhost ~]$chmod u+rwx,g=rx,o-rwx /home/git/gitlab-satellites
#复制unicorn配置
[git@localhost ~/gitlab]$cd config
[git@localhost ~/gitlab/config]$cp unicorn.rb.example unicorn.rb

listen "127.0.0.1:8080" #这里显示监听在lo上面,和上面的配置相对应
#修改数据库配置,主要是用户名和密码
[git@localhost ~/gitlab/config]$cp database.yml.mysql database.yml

[git@localhost ~/gitlab/config]$cat database.yml
#
# PRODUCTION
#
production:
  adapter: mysql2
  encoding: utf8
  collation: utf8_general_ci
  reconnect: false
  database: gitlabhq_production
  pool: 10
  username: gitlab
  password: "gitlabpasswd"
  # host: localhost
  # socket: /tmp/mysql.sock

development:
  adapter: mysql2
  encoding: utf8
  collation: utf8_general_ci
  reconnect: false
  database: gitlabhq_development
  pool: 5
  username: root    #这里root有设置密码,下面填写自己设置的
  password: "234567"

[git@localhost ~/gitlab/config]$chmod o-rwx database.yml    #最小化权限
#配置git的用户和邮箱
[git@localhost ~]$git config --global user.name "GitLab"
[git@localhost ~]$git config --global user.email "gitlab@abc.com"
[git@localhost ~]$git config --global core.autocrlf "input"
安装Gems
[root@localhost ~]#gem install charlock_holmes --version '0.6.9.4'
安装mysql依赖包
[root@localhost ~]#su - git
[git@localhost ~]$cd gitlab
[git@localhost ~/gitlab]$bundle install --deployment --without development test postgres puma aws
Tip1: gem install和bundle install这两步安装的时候很坑爹, 因为安装的源都是国外的, 所以有时候会因为网络的原因导致整个安装过程频频失败, 因为这两步耗费了大量的精力。后来等公司人少了之后, 安装就很顺利了。so建议找个人少网好的地方执行这两步骤。
Tip2: 如果安装过程中出现长时间没有反应的时候, 可以尝试将GemFile里边source: http://rubygems.org 替换成 source: “https://ruby.taobao.org“, 然后再尝试。
初始化数据库
[git@localhost ~/gitlab]$bundle exec rake gitlab:setup RAILS_ENV=production
完成之后会生成一个默认的管理员账号:
login.........root
password......5iveL!fe
查看系统信息
[git@localhost ~/gitlab]$bundle exec rake gitlab:env:info RAILS_ENV=production

System information
System:		CentOS 6.8
Current User:	git
Using RVM:	no
Ruby Version:	2.1.2p95
Gem Version:	2.2.2
Bundler Version:1.15.1
Rake Version:	10.3.2
Sidekiq Version:2.17.0

GitLab information
Version:	7.4.5
Revision:	19d572e
Directory:	/home/git/gitlab
DB Adapter:	mysql2
URL:		http://abc.com
HTTP Clone URL:	http://abc.com/some-project.git
SSH Clone URL:	git@abc.com:some-project.git
Using LDAP:	no
Using Omniauth:	no

GitLab Shell
Version:	2.0.1
Repositories:	/home/git/repositories/
Hooks:		/home/git/gitlab-shell/hooks/
Git:		/usr/bin/git
安装gitlab的服务启动脚本
[root@localhost ~]#wget -O /etc/init.d/gitlab https://raw.github.com/gitlabhq/gitlab-recipes/master/init/sysvinit/centos/gitlab-unicorn

100%[==================================================>] 2,396       --.-K/s   in 0s

2017-06-26 23:48:55 (9.53 MB/s) - “/etc/init.d/gitlab” saved [2396/2396]

[root@localhost ~]#chmod +x /etc/init.d/gitlab
[root@localhost ~]#chkconfig --add gitlab
[root@localhost ~]#chkconfig gitlab on
启动gitlab
[root@localhost ~]#service gitlab start
Starting unicorn:                                          [  OK  ]
Starting sidekiq:                                          [  OK  ]
启动服务后,Tip: 这里可以看到一些检测的日志, 如果中间出现了红色的报错信息, 那就挨个解决。其中Init script up-to-date整个错误, 官方文档上提示可以忽略。
[root@localhost ~]#su - git
[git@localhost ~]$ls
gitlab  gitlab-satellites  gitlab-shell  repositories

[git@localhost ~]$cd gitlab
[git@localhost ~/gitlab]$bundle exec rake gitlab:check RAILS_ENV=production
访问页面的时候要加载大量的资源, 但是服务器尚未生成这些页面的资源, 所以需要执行下面的命令编译生成需要的资源文件。
解决办法:
$ cd /home/git/gitlab
$ bundle exec rake assets:precompile RAILS_ENV=production
nginx配置
[root@localhost ~]#cp /home/git/gitlab/lib/support/nginx/gitlab /usr/local/nginx/conf/conf.d/gitlab.conf

[root@localhost /usr/local/nginx/conf/conf.d]#mv 80.conf 80.conf.bak

[root@localhost /usr/local/nginx/conf/conf.d]#cd
[root@localhost ~]#service nginx reload
Reloading nginx:                                           [  OK  ]

将nginx加入git用户组,确保nginx有访问gitlab目录的权限,避免出现403错误
[root@localhost ~]#usermod -a -G git nginx
[root@localhost ~]#chmod g+rx /home/git/
防火墙设置
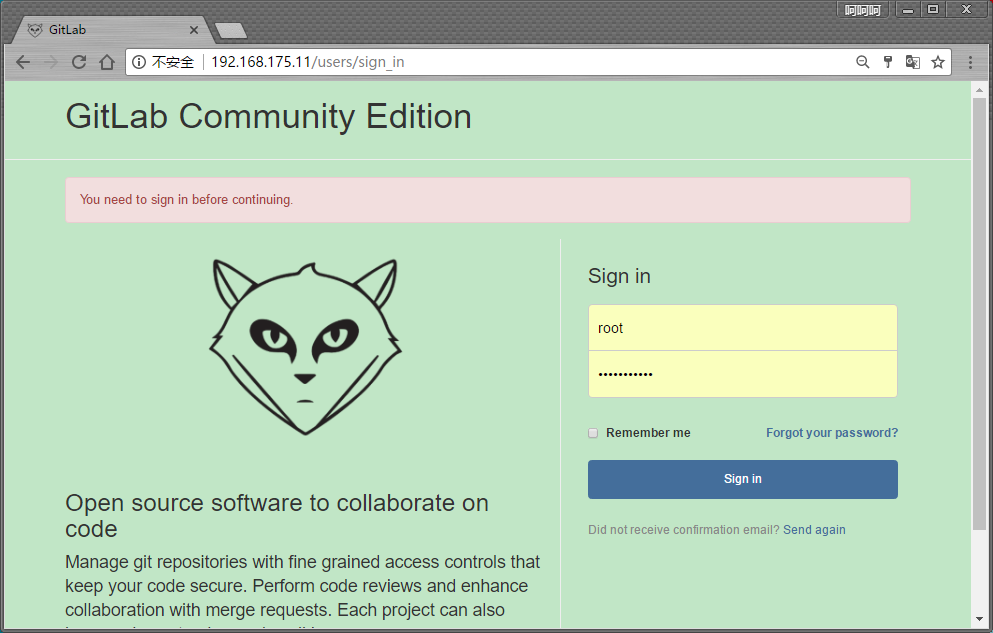
然后就可以访问了

设置密码:5iveL!fepass432
步骤比较多
参考文档:搭建gitlab
参考文档:官方rpm安装
–
–
–
 江哥架构师笔记
评论前必须登录!
注册